Table of contents
- Aaj thodi padhai krte hai on Docker Compose 😃
- ❄What is Docker Compose?
- ❄Docker Compose Commands
- ❄What is YAML?
- ❄The syntax of the YAML file is:
- ❄Example of a YAML file:
- ❄Tasks :- 📝
- 📝Step 1 : Install docker-compose :-
- 📝Step 2 : Created a directory containing a web application from github :-
- 📝Step 3 : Create a docker-compose.yml file inside react_django_demo_app directory
- 📝Step 4 : Run docker-compose.yml file
- 📝Step 5 : Verify that application is working by accessing it in a web browser :-
- 📝Step 6 : If we need to down or close the application then need to use the below command.
- 🎯Task-2📝
- 📝2 :- Inspect the container's running processes and exposed ports using the docker inspect command.
- 📝3 :- Use the docker logs command to view the container's log output.
- 📝4 :- Use the docker stop and docker start commands to stop and start the container.
- 📝5. Use the docker rm command to remove the container when you're done.
- 📚🐋📝Feel free to ask me, if you need any help regarding this docker project📚🐋📝
- ❄Thank you for reading! I hope you find this article helpful❄
- ❄❄🐋🐋❄❄❄The End❄❄❄🐋🐋❄❄❄
☸️In the last two articles, we saw the basic commands of Docker and we even build docker files to deploy the web application on the browser. Now let’s take a step ahead Let’s dive into the world of Docker and unlock its transformative potential for DevOps engineers. Together, we will navigate the intricacies of containerization, gain hands-on experience with Docker, and elevate our DevOps practices to the next level.☸️
Aaj thodi padhai krte hai on Docker Compose 😃
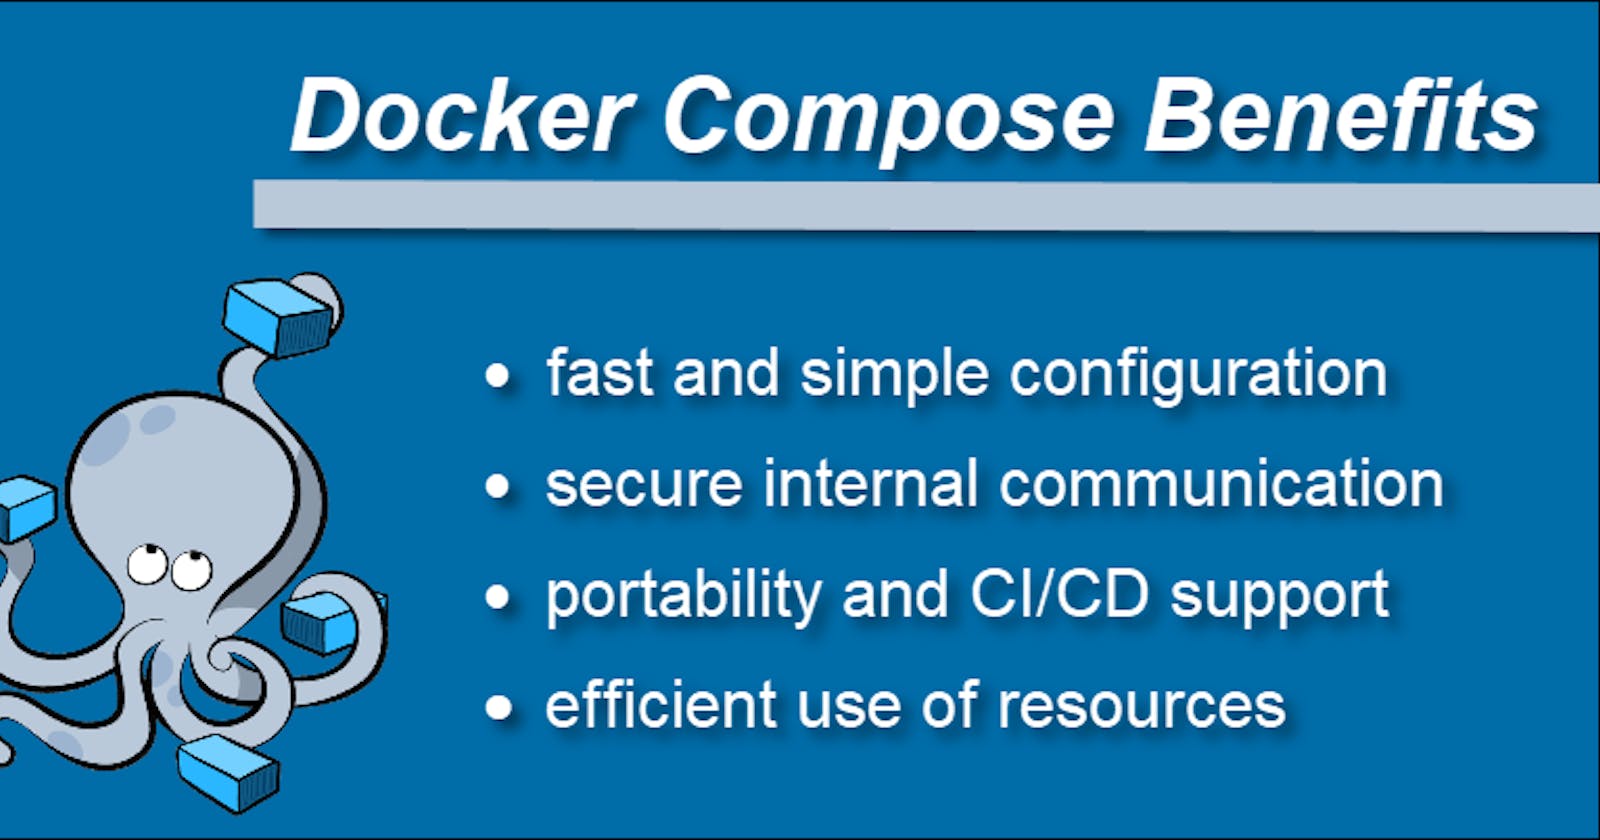
❄What is Docker Compose?
Docker Compose is a tool that was developed to help define and share multi-container applications. With Compose, we can create a YAML file to define the services and with a single command, can spin everything up or tear it all down.
❄Docker Compose Commands
🐋The basic commands that bring hand on experience in docker-compose are:
Docker Compose up: Command used to start all the services of the container.
Docker Compose down: This syntax is used to stop all the services that were started.
Docker_compose_v: To check the version of docker-compose, we use this command.
Docker ps: This command is used to bring out the whole process of Docker.
Docker Compose.yml: This command is used to configure application services using YAML files.
Docker-compose up -d: Used to run a Docker-Compose file.
Docker Compose up -d -scale: Used to scale the service of the container.
pip install -U Docker-compose: Command used to install Docker Compose using pip.
🐋Using Docker-Compose is essentially a three-step process:
Define your app’s environment with a
Dockerfileso it can be reproduced anywhere.Define the services that make up your app in
docker-compose.ymlso they can be run together in an isolated environment.Run
docker compose upand the Docker compose command starts and runs your entire app. You can alternatively rundocker-compose upusing Compose standalone(docker-composebinary).
❄What is YAML?
- YAML is a data serialization language that is often used for writing configuration files. Depending on whom you ask, YAML stands for yet another markup language or YAML ain’t markup language (a recursive acronym), which emphasizes that YAML is for data, not documents.
- YAML is a popular programming language because it is human-readable and easy to understand.
- YAML files use a .yml or .yaml extension.
❄The syntax of the YAML file is:
keyword: argument
❄Example of a YAML file:
Name: Sajid Perwaiz
Gender: M
Email: sajidp7870@gmail.com
❄Tasks :- 📝
1 ) Learn how to use the docker-compose.yml file, to set up the environment, configure the services and links between different containers, and also to use environment variables in the docker-compose.yml file.
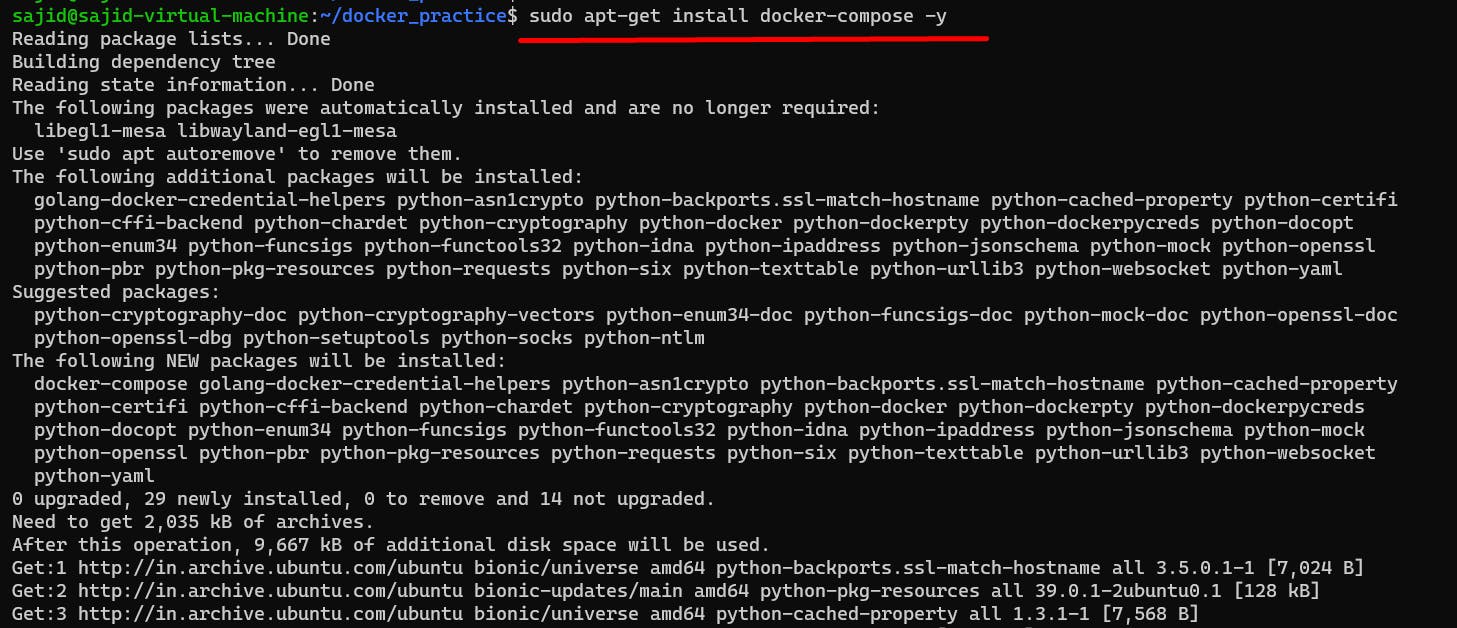
📝Step 1 : Install docker-compose :-
📝Step 2 : Created a directory containing a web application from github :-
git clone https://github.com/sajidperwaiz/react_django_demo_app.git

📝Step 3 : Create a docker-compose.yml file inside react_django_demo_app directory
version: '3.3'

services:
  mera_web:
    container_name: 'django-app-container'
    build: .
    ports:
      - "8001:8001"

  mera_db:
    container_name: 'mysql_container'
    image: mysql:5.7
    ports:
      - "3306:3306"
    environment:
      MYSQL_ROOT_PASSWORD: 'test@123'
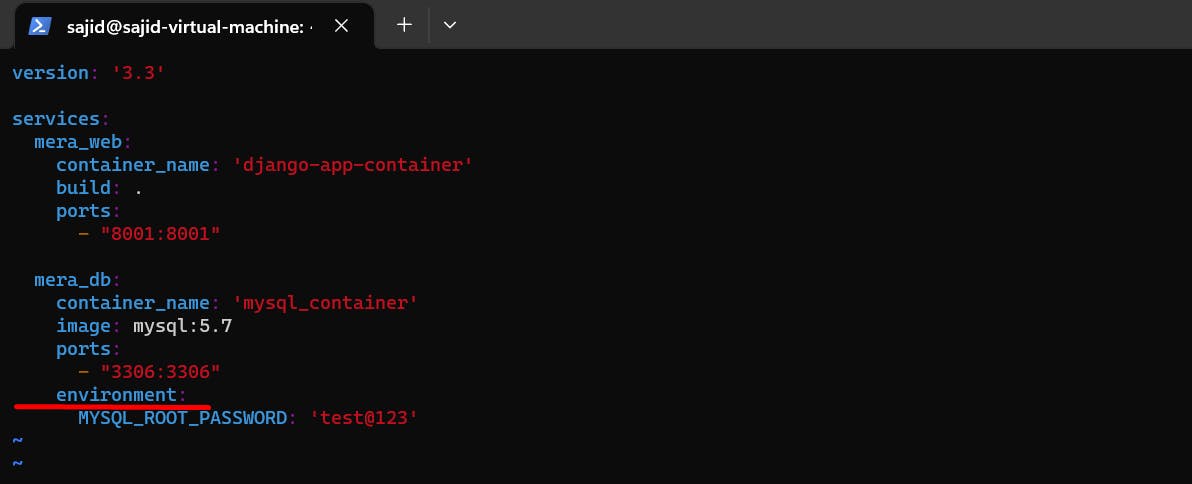
version:"3.9" denotes that we are using version 3.9 of Docker Compose.
The services section defines all the different containers we will create. In our example, we have two services, Web and Database.
The build keyword specifies the location of our Dockerfile, and . represents the directory where the docker-compose.yml file is located.
The image keyword is used to specify the image from DockerHub for MYSQL containers
For the database and web , we are using the ports keyword to mention the ports that need to be exposed.
And then, we also specify the environment variables for MySQL which are required to run MySQL.
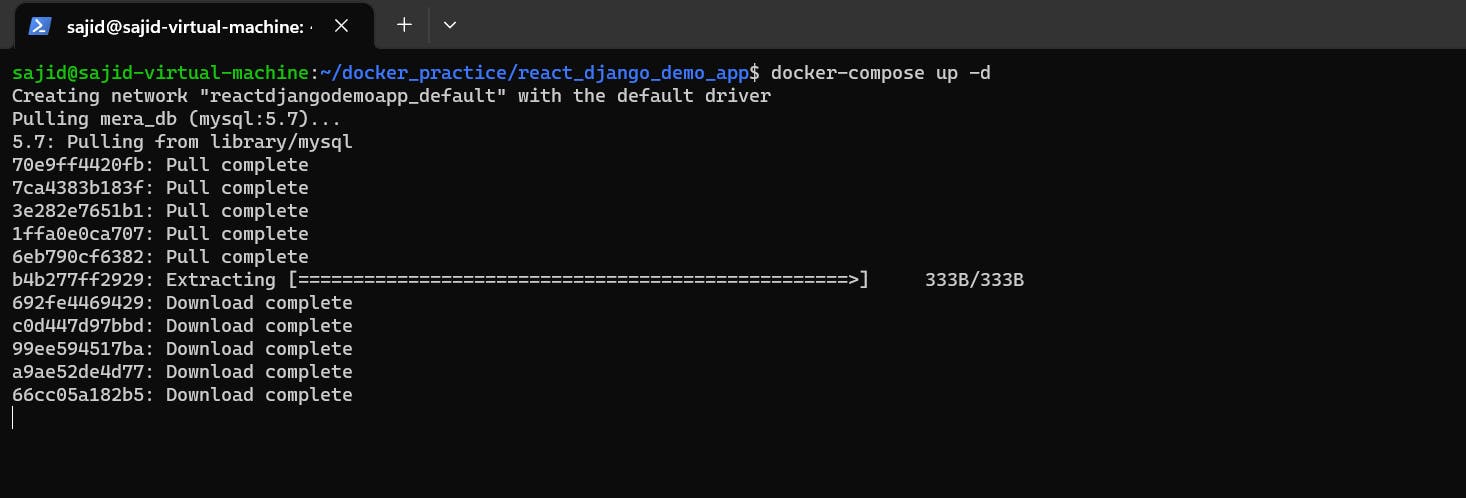
📝Step 4 : Run docker-compose.yml file
docker-compose up: This command does the work of the docker-compose build and docker-compose run commands. It builds the images if they are not located locally and starts the containers. If images are already built, it will fork the container directly.
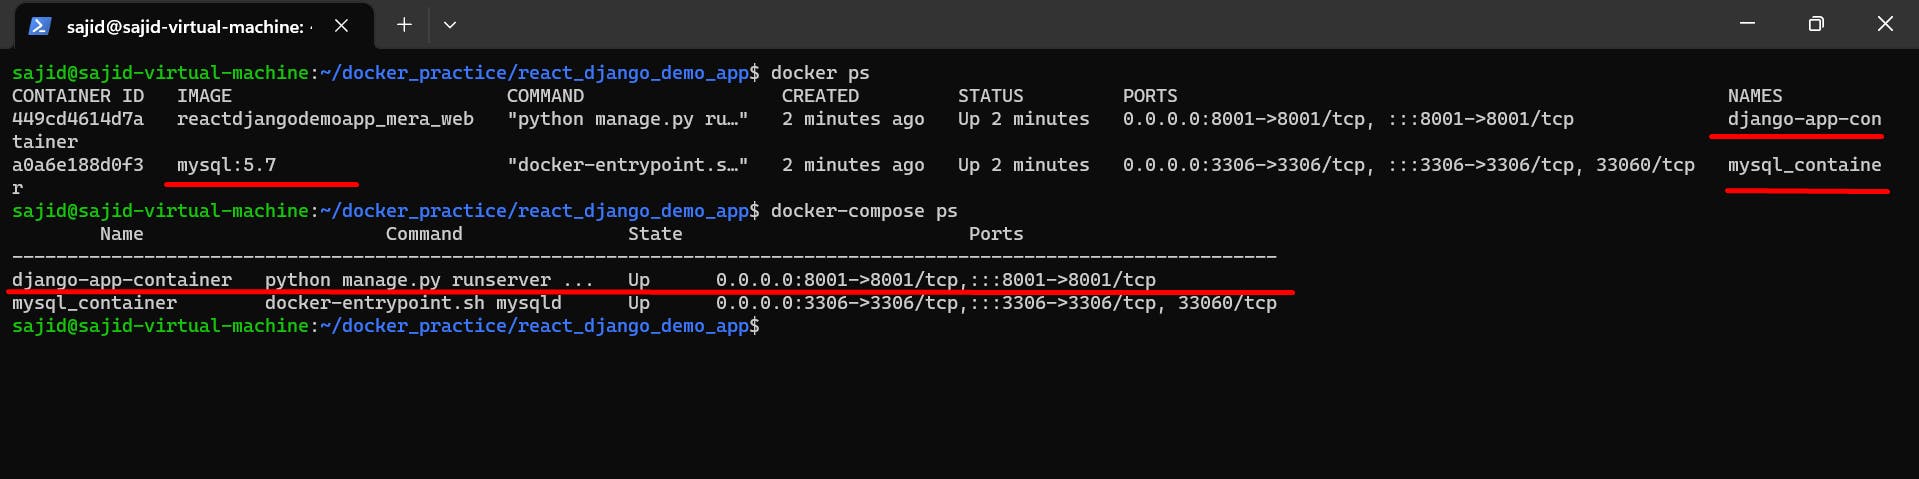
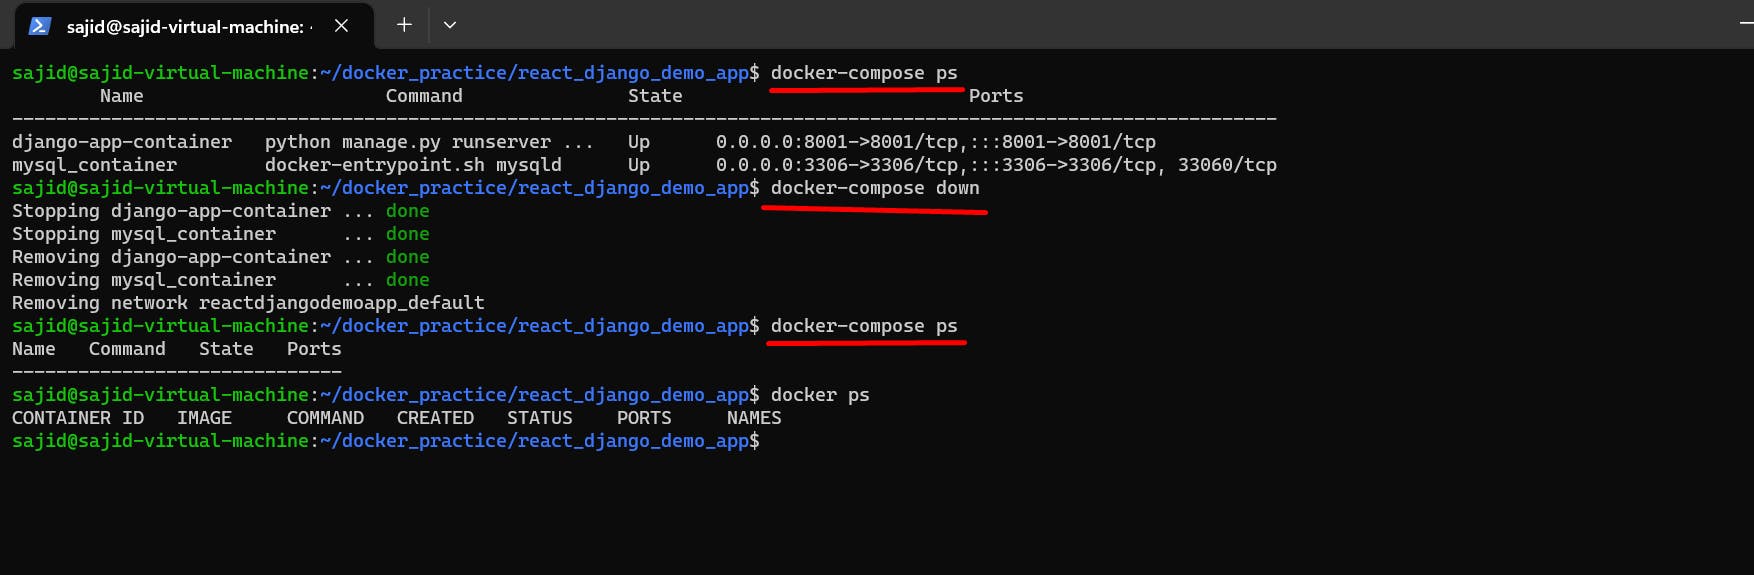
docker ps or docker-compose ps command list all the containers in the current docker-compose file.
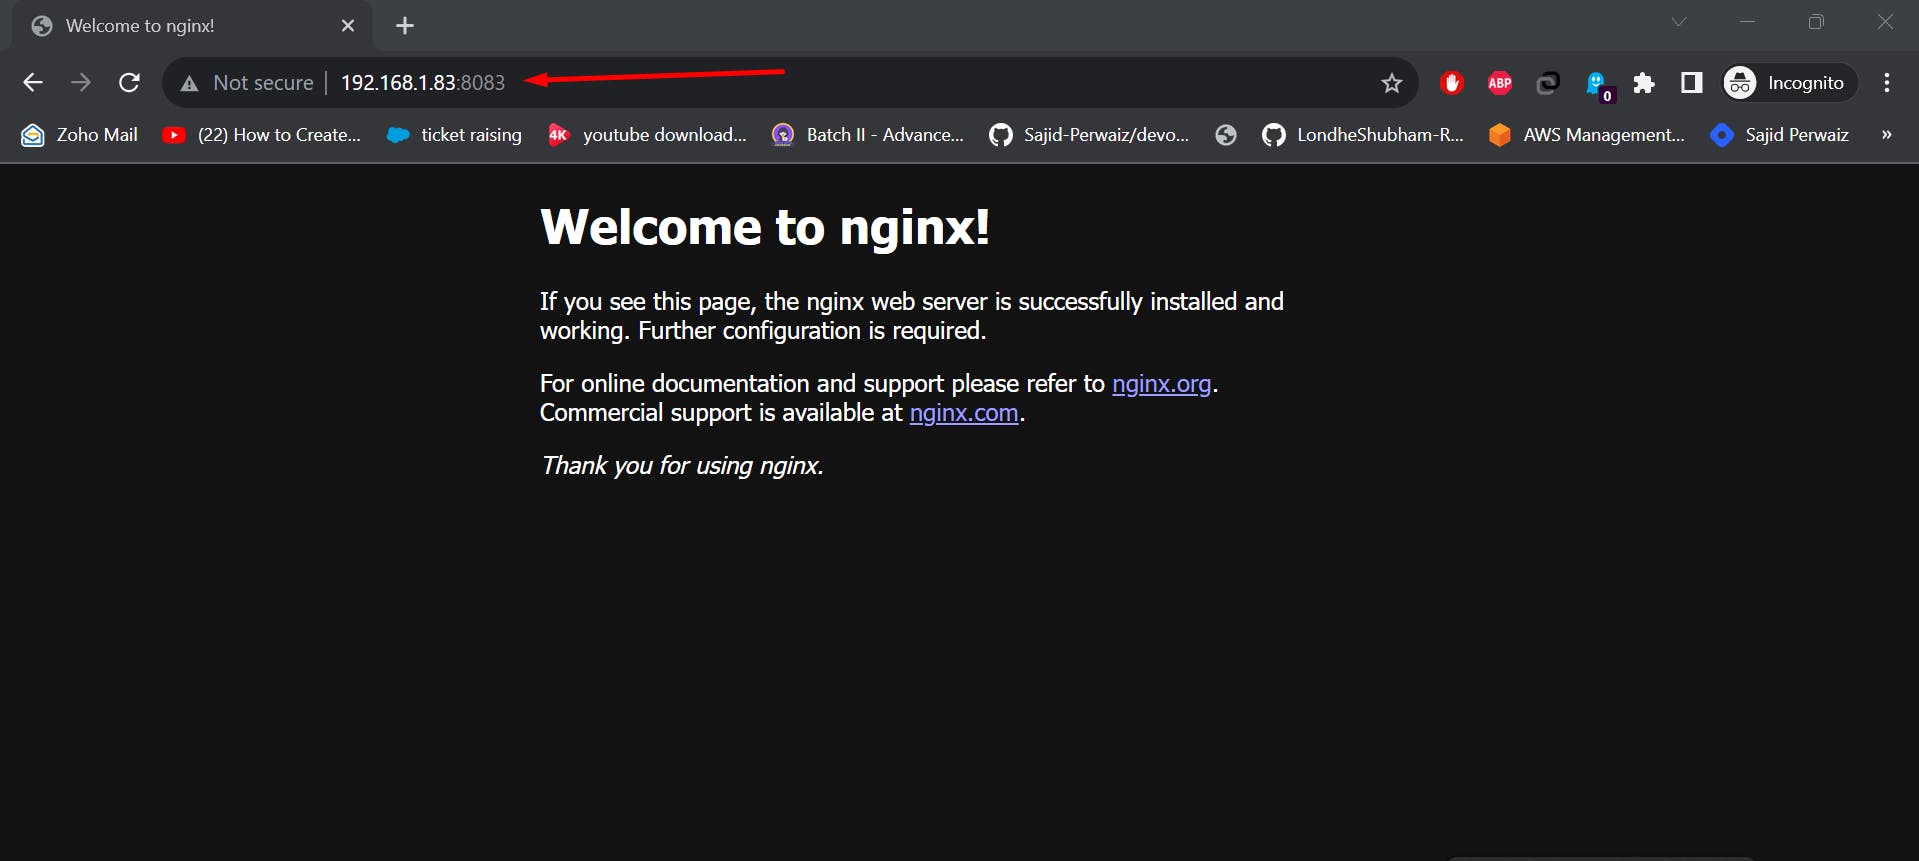
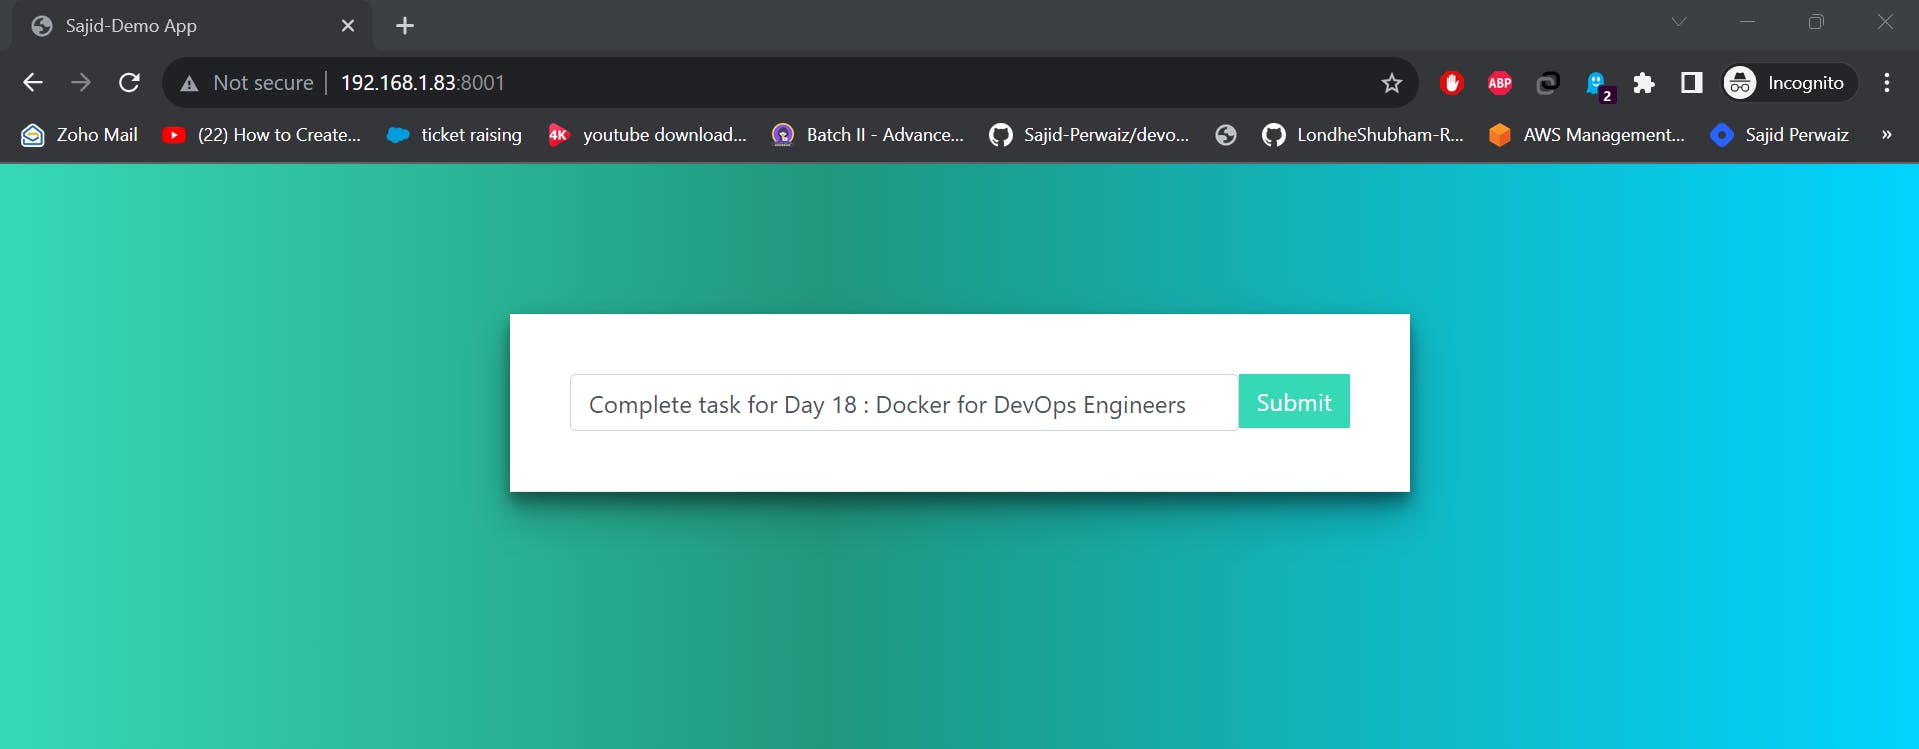
📝Step 5 : Verify that application is working by accessing it in a web browser :-
📝Step 6 : If we need to down or close the application then need to use the below command.
🐋docker-compose down : This command stops all the services and cleans up the containers, networks, and images.
sudo docker-compose down
🎯Task-2📝
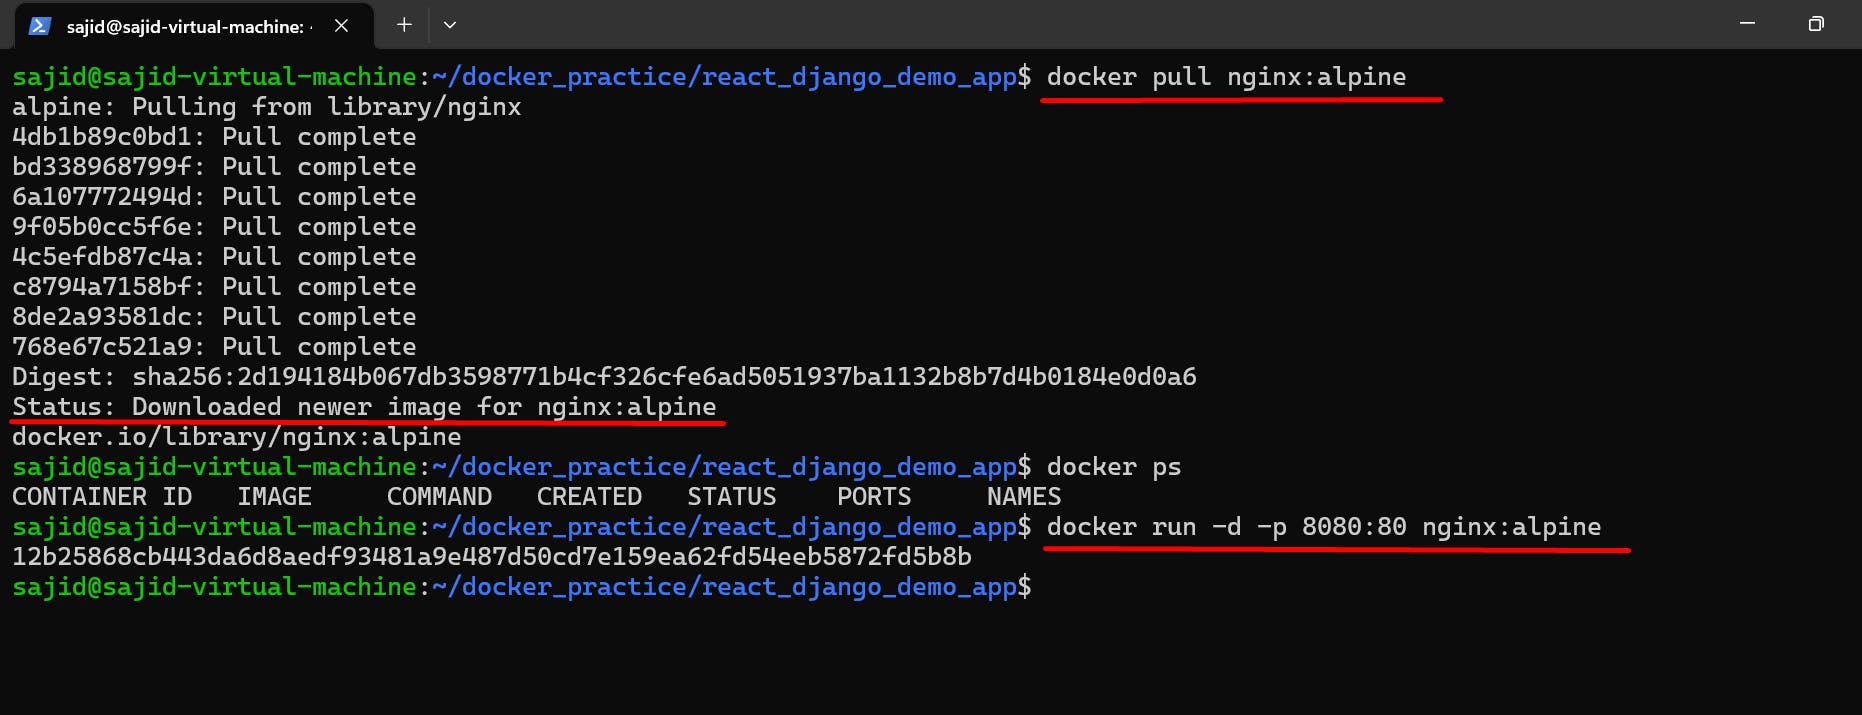
🐋1.Pull a pre-existing Docker image from a public repository (e.g. Docker Hub) and run it on your local machine. Run the container as a non-root user.
docker pull nginx:alpine
docker run -d -p 8080:80 nginx:alpine
for running container as a non-root user, use command usermod to give user permission to docker
sudo usermod -a -G docker $USERThen reboot the instance after giving permission to the user.

📝2 :- Inspect the container's running processes and exposed ports using the docker inspect command.
docker inspect <container_name or ID>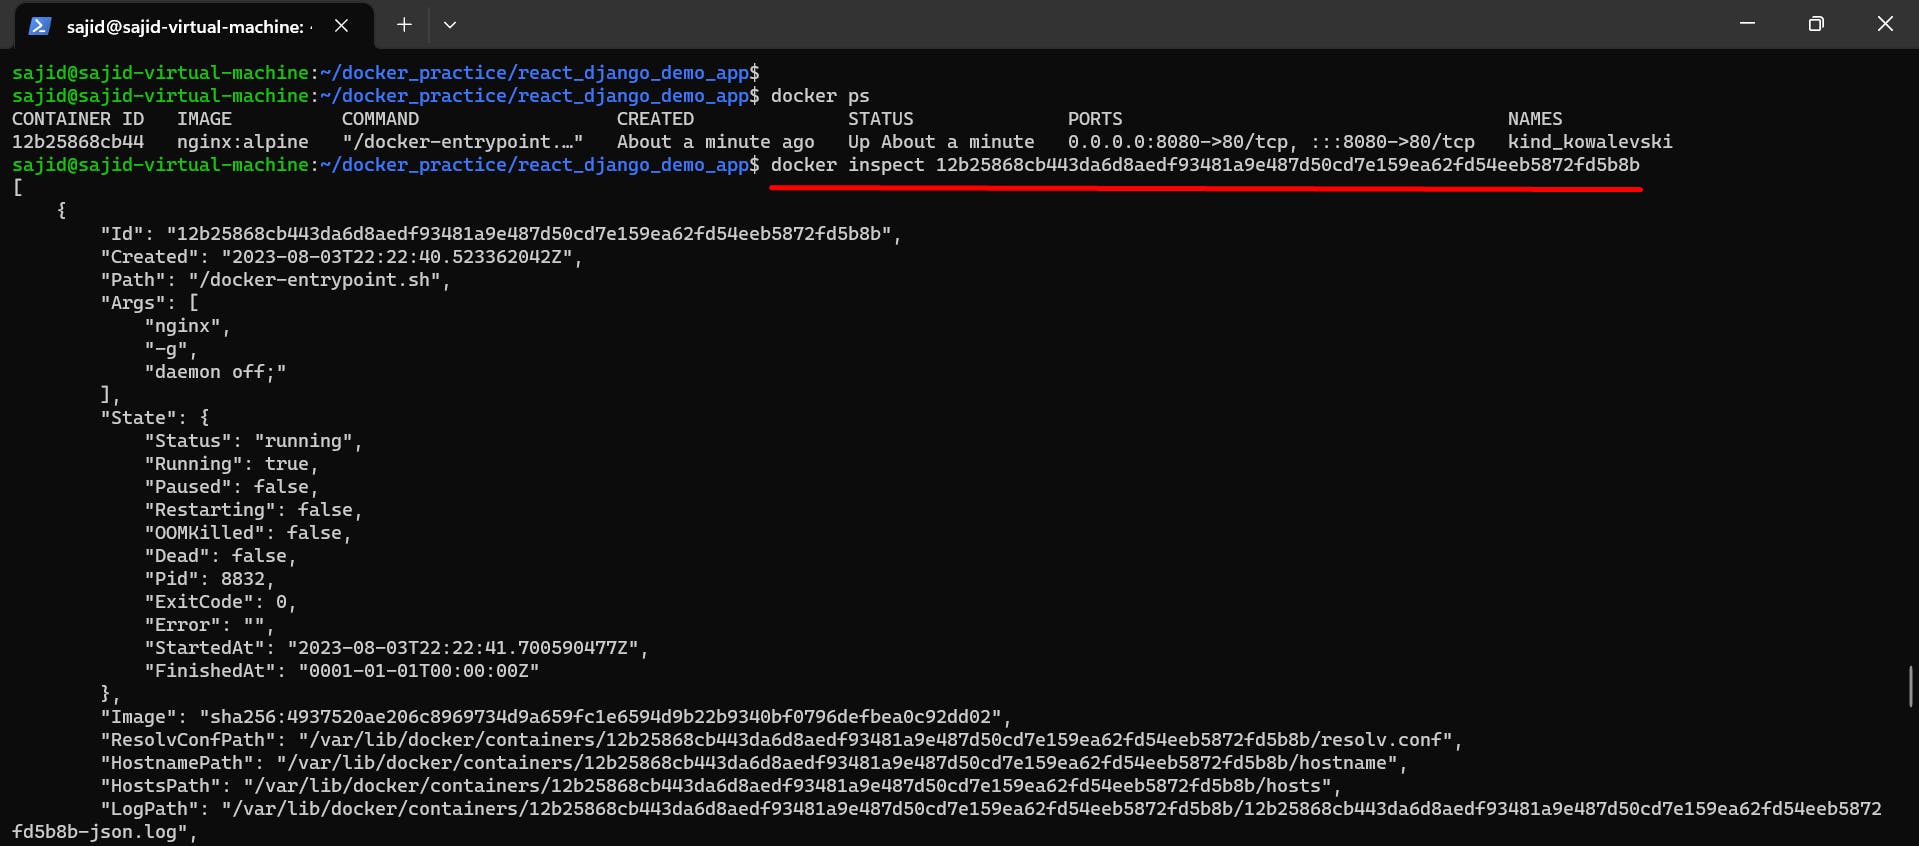
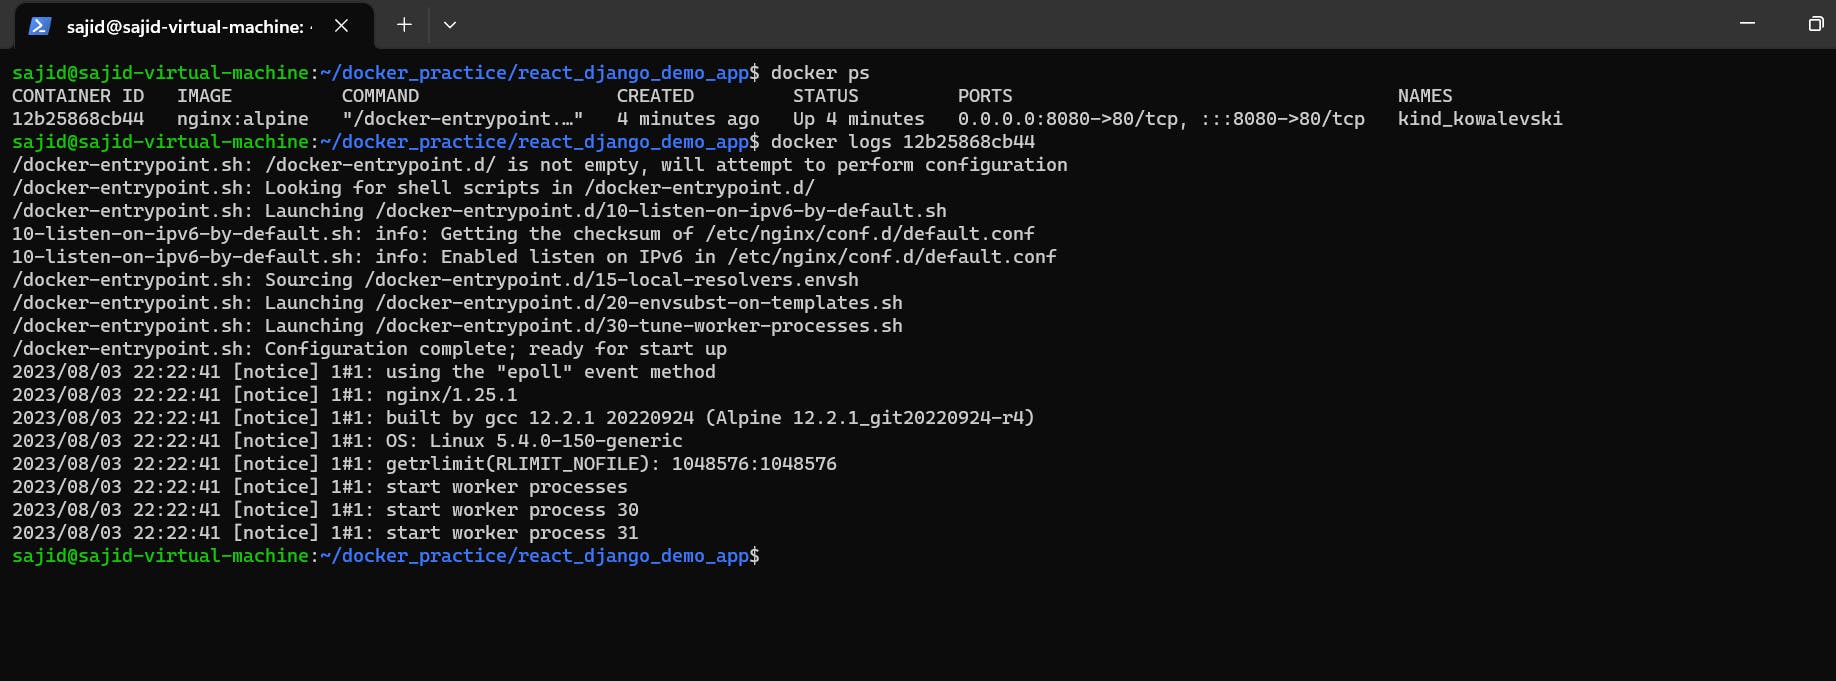
📝3 :- Use the docker logs command to view the container's log output.
docker logs <container_name or ID>
📝4 :- Use the docker stop and docker start commands to stop and start the container.
🐋docker stop : To stop one or more running Docker containers.
docker stop <container-name or ID>
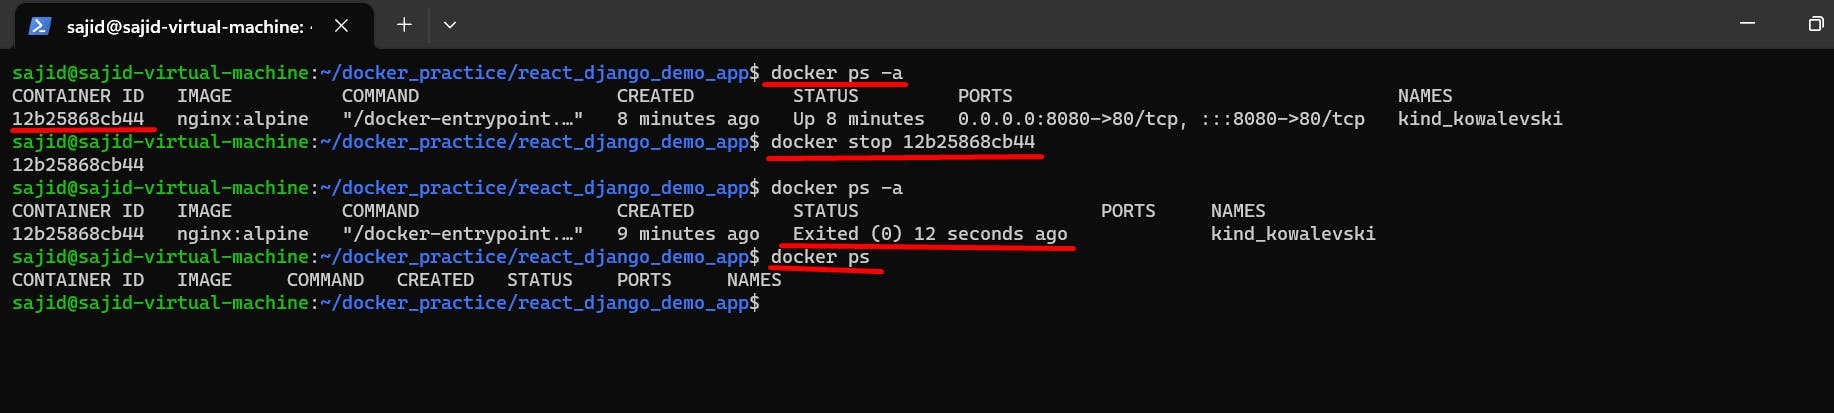
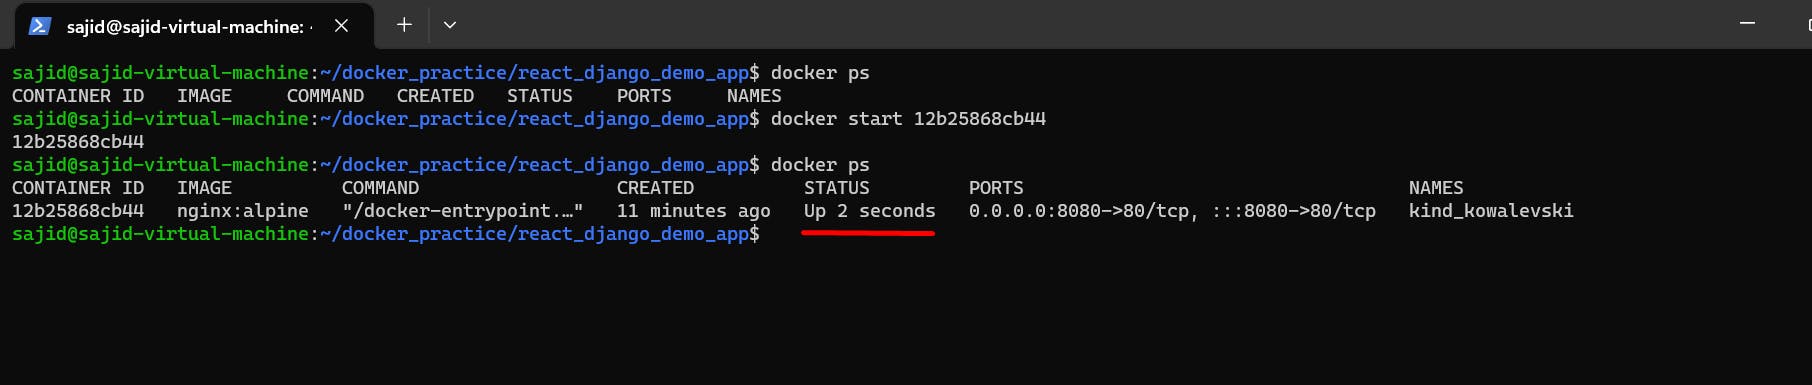
🐋docker start : Start one or more stopped containers.
docker start <container-name or ID>
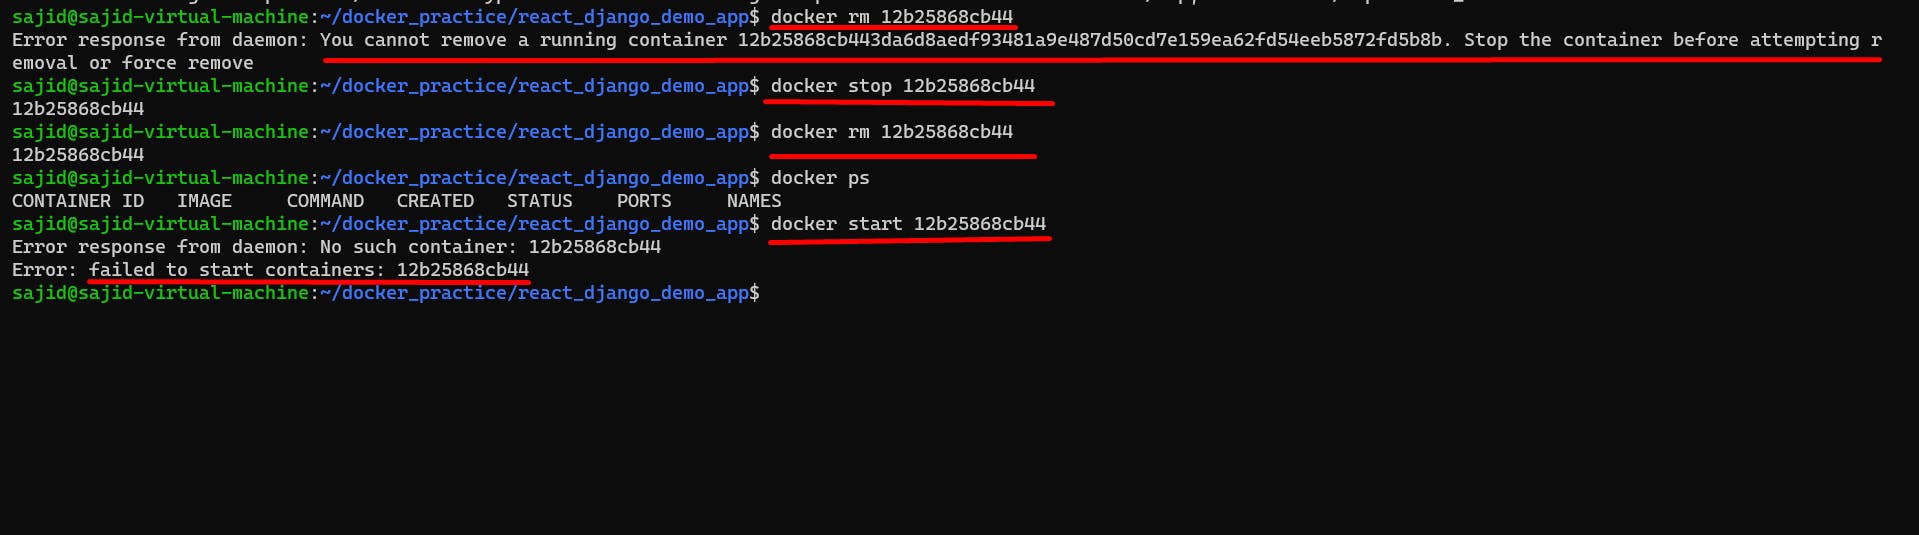
📝5. Use the docker rm command to remove the container when you're done.
🐋docker rm : Remove one or more containers
docker rm <container_name or ID>
🐋 --force , -f : Force the removal of a running container.
🐋Run the container in demeon mode
sudo docker run -d -p 8083:80 nginx:alpine